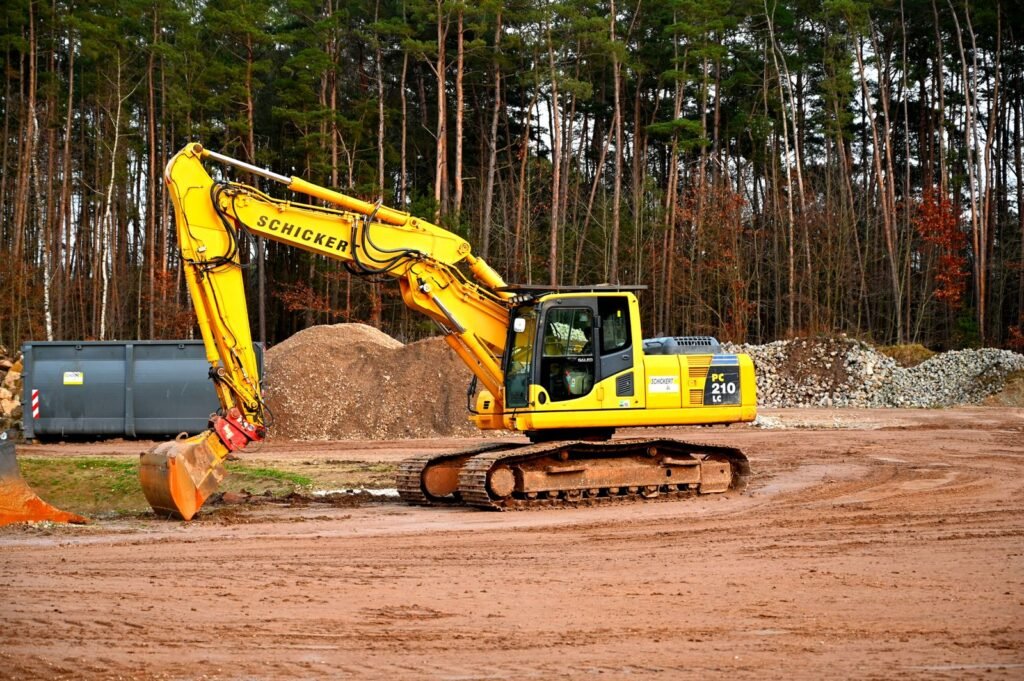
Every building starts with a hole, or at least with a patch of ground that has been cut, levelled and shaped to take the structure. Excavation looks simple from the road: a machine scoops soil, a truck carries it away. In reality it is one of the most hazardous and most error-prone stages of any project. Mistakes made here, such as striking a buried cable, digging to the wrong depth or leaving a trench wall unsupported, are expensive to fix and sometimes dangerous.
This guide explains how to excavate a construction site in a sensible order: planning, checks before you dig, the digging sequence itself, protection against collapse, water control and backfilling. It is written for homeowners managing a small build, new site supervisors and anyone who wants to understand what a competent excavation crew is actually doing. It is general information, not a substitute for your engineer’s drawings, your local regulations or a qualified contractor.
What Counts as Excavation?
The US Occupational Safety and Health Administration (OSHA) defines an excavation as any man-made cut, cavity, trench or depression in the earth’s surface formed by earth removal. That covers a house foundation, a utility trench, a basement dig and a roadworks pit. A trench is a narrow excavation that is deeper than it is wide and no wider than 15 feet (about 4.5 metres). The same basic principles apply wherever you work, although the specific rules differ by country and region.
Step 1: Plan Before You Break Ground
Good excavation is 70 percent planning. Before a machine arrives, you should have answers to five questions.
- What are you building, and how deep must the excavation go? Your structural drawings should state formation levels, foundation depths and the footprint including working space around the walls.
- What permits and approvals are needed? Building control, planning conditions, road-opening licences and noise or working-hour limits vary widely.
- Where will the spoil go? Soil is bulky. Decide what is stored on site for backfill and what is removed, and check whether disposal sites accept it.
- Who is the responsible person on site? Someone must be able to recognise hazards and stop work.
- What is the emergency plan? Know the nearest access point for emergency vehicles and how workers would be rescued from a pit.
Step 2: Find Out What Is Underground
Striking a gas main, water pipe or electrical cable is the most common excavation disaster. Never assume the ground is empty because a site looks undeveloped.
In the United States, the national “811” service routes your request to local utility owners, who mark the approximate location of buried lines, usually free of charge, before you dig. In the United Kingdom, you can request plans from utility companies and use asset-search services, then confirm positions on site with a cable avoidance tool and trial holes dug by hand. Other countries have equivalents. Whatever the system, the principles are the same:
- Obtain the plans and mark-outs before work starts.
- Treat markings as approximate. Hand-dig or use vacuum excavation near marked services.
- Check for overhead cables that a raised excavator arm or tipper body could touch.
- Look for old, undocumented services such as abandoned drains, tanks and cellars on previously developed land.
Step 3: Understand the Soil and Groundwater
Soil behaviour decides how steeply you can cut a side wall, what support you need and whether water will be a problem. A site investigation, ranging from a few trial pits on a small build to full boreholes on a large one, tells you what lies below.
OSHA classifies soil as stable rock, Type A, Type B or Type C, with Type C the least stable, such as sand, gravel or soil that is saturated. The classification determines the maximum safe slope and the protective system required. Benching, for example, is not permitted in Type C soil. Clay behaves very differently from sand. A clay wall may stand vertical for a short time and then fail suddenly, while dry sand slumps almost immediately.
Also record the groundwater level. If you expect to dig below it, you need a dewatering plan before you start, not after the pit floods.
Step 4: Set Up the Site
Preparation on the surface makes the dig faster and safer.
- Fence and sign the site. Keep the public, children and animals out. Open excavations are a serious hazard for anyone walking past.
- Create a haul route. Plan where trucks enter, load and turn so that machines do not reverse into pedestrians or drive along the edge of the cut.
- Clear vegetation and debris. Remove trees and obstacles within the working area, with the necessary permissions for protected trees.
- Strip the topsoil. Topsoil is valuable. Remove it first and store it separately from the subsoil so you can reuse it for landscaping.
- Set out the building. A surveyor or experienced site engineer marks corners, lines and levels with pegs and profile boards. Re-check these against the drawings before any deep digging.
- Install erosion and sediment controls. Silt fences or barriers prevent muddy runoff entering drains and neighbouring land.
Step 5: Choose the Right Equipment
The machine should match the job, the soil and the access.
- Mini excavators (1 to 8 tonnes) suit house extensions, garden projects and tight access.
- Medium and large excavators handle full house foundations, basements and commercial sites.
- Backhoe loaders combine digging with loading and are common on small sites and utility work.
- Bulldozers and graders shape and level large areas.
- Tipper trucks remove spoil, and a compactor is needed for backfilling.
Use a trained, certified operator. Machine hire prices vary by region and season, so get several quotes and ask whether the operator, fuel and transport are included.
Step 6: Dig in a Controlled Sequence
A typical bulk excavation for a foundation follows a predictable pattern.
- Cut from the top down in layers. Take the soil in manageable lifts rather than one deep bite, so that you can check the walls as you go.
- Keep the sides sloped or supported from the start. Do not dig deep first and plan the support later.
- Control the depth. Use a laser level or levelling staff so the formation level is neither too high nor too deep. Over-digging creates a void you must refill with compacted material or concrete.
- Keep spoil back from the edge. OSHA guidance advises keeping materials away from the trench edge. A common site rule is to hold spoil piles and equipment at least a metre or two back, or further as the engineer specifies.
- Trim the base by hand or with a smooth bucket. A clean, level formation protects the bearing soil from being disturbed.
- Have the formation inspected. The engineer or building inspector checks that the ground is as expected before concrete is poured. If soft pockets appear, they need to be dug out and replaced as directed.
Step 7: Protect Against Collapse
Trench collapse is the greatest single risk. OSHA states that cave-ins pose the greatest threat to workers’ lives in trenching, and its guidance on protection is straightforward: slope or bench the walls, shore them with supports, or shield them with trench boxes.
The four main protective approaches
- Sloping cuts the wall back at an angle away from the excavation. Space is needed, so it works best on open sites.
- Benching cuts the side into horizontal steps. As noted, it is not allowed in Type C soil.
- Shoring installs hydraulic, mechanical or timber supports against the walls to stop soil movement.
- Shielding places a trench box or shield inside the cut. The box does not hold the soil back, but it protects workers if the wall fails.
Under US federal rules, trenches 5 feet (1.5 metres) deep or more need a protective system unless the excavation is made entirely in stable rock. Shallower trenches may still need protection if a competent person sees signs of hazard. Excavations of 4 feet or deeper also need a safe way in and out, such as a ladder, steps or a ramp. Other jurisdictions have their own thresholds, so check your local rule instead of relying on a single number.
The competent person
OSHA requires a competent person to inspect excavations daily and as often as needed while work progresses, as well as after rain or any event that could change conditions. They look for cracking, bulging, water, vibration and changes in soil. Their authority to stop work is as important as their technical knowledge.
Step 8: Manage Water
Water weakens soil, floods pits and undermines nearby structures. Use the simplest method that works.
- Divert surface water with bunds and ditches so that it does not run into the excavation.
- Sump pumping collects water at a low corner and pumps it away. It suits small inflows.
- Wellpoints or deep wells lower the groundwater level for deeper work and are designed by specialists.
- Discharge responsibly. Muddy water must usually be settled or filtered and may need a discharge consent.
Step 9: Protect Neighbours and Nearby Structures
Digging near an existing building or boundary wall can undermine its foundations. A rule of thumb used on many sites is that excavation deeper than the neighbouring foundation within a certain distance needs engineered support, but the exact geometry depends on soil and load. In the UK, the Party Wall etc. Act 1996 can apply, and in other places similar notice requirements exist. Take photographs of existing cracks before you start, monitor movement during the dig and talk to neighbours early.
Step 10: Backfill and Compact
When the structure is built and cured, the excavation is refilled. Poor backfilling causes settlement, cracked slabs and leaks years later.
- Wait until concrete has reached the strength the engineer specifies and any waterproofing is protected.
- Use suitable material. Avoid organic soil, rubble and large lumps that leave voids.
- Place it in layers of roughly 150 to 300 millimetres (6 to 12 inches), compacting each layer with a plate compactor or roller.
- Backfill evenly on both sides of a retaining or basement wall so that one side is not pushed over.
- Slope the finished ground away from the building so rainwater drains outward.
Common Excavation Mistakes
- Digging without checking buried services.
- Working in a trench that is deep and unsupported “just for a minute”.
- Piling spoil at the edge of the cut, adding load and sending material back in.
- Ignoring weather. Heavy rain can turn a safe wall into an unsafe one overnight.
- Over-digging the formation and then backfilling with loose soil under a foundation.
- Mixing topsoil with subsoil, which wastes a valuable resource.
- Skipping daily inspection records.
How Much Does Excavation Cost?
Costs depend on volume, soil, access, disposal fees, machine size and local labour rates, so any single figure would mislead you. Spoil removal is often the largest line item because soil is heavy and disposal sites charge by the tonne. To keep the budget realistic, ask each contractor to price the dig, the haulage, the disposal, the protective systems and the dewatering as separate lines, and include a contingency for ground conditions that turn out worse than the survey suggested.
Excavation Checklist
- Permits and approvals in place.
- Underground services located and marked.
- Soil and groundwater information reviewed.
- Site fenced, signed and access routes planned.
- Topsoil stripped and stored separately.
- Protective system chosen and available before the dig starts.
- Safe access and exit provided for every deep excavation.
- Competent person appointed and daily inspections recorded.
- Water-control and emergency plans ready.
- Formation inspected before concrete is placed.
Frequently Asked Questions
Can I excavate my own foundation?
Small garden jobs are manageable for many homeowners, but foundations and anything deeper than shoulder height involve real collapse and service-strike risks. For a building foundation, hire a qualified contractor or at least get an engineer to specify the work.
How deep should a foundation excavation be?
The depth is set by the structural design and local frost depth, soil and building rules. Your engineer or building inspector gives the figure for your site.
What is the safest way to dig a trench?
Locate services first, keep the walls sloped or supported, keep spoil and machinery away from the edge, provide a way out and have a competent person inspect the trench before anyone enters.
Do I need an excavation permit?
It depends on where you are and what you are building. Many places require building permits, and some require separate permits for road openings or work near utilities. Ask your local authority.
Final Thoughts
Excavating a construction site is not about moving soil quickly. It is about moving it in the right order, with the right information and with the walls of the hole under control. Find the services, understand the ground, choose the protective system before you need it and make daily inspection a habit. Do that and the dig becomes a predictable first step instead of a source of delays and accidents.
Disclaimer: This article is general information only and is not engineering, legal or safety advice. Requirements differ by country, state and project. Always follow the instructions of your qualified engineer, your local regulations and your contractor’s safety plan.

Lois Snyder is a versatile writer with experience across multiple domains. She crafts engaging and informative content, delivering valuable insights and captivating readers with her expertise and passion for diverse topics.